"Here to Help" is a support column written especially for Formstack's awesome, loyal customers. This post is part of a three-post series highlighting popular, but complex, Formstack features.
Are you familiar with Formstack’s Conditional Logic feature? If so, you know it can be a great way to streamline your online forms. If not, lean in!
Conditional Logic is a form builder feature that lets you easily show or hide form fields based on how someone responds to other fields on the form. It can be thought of as conditional branching, where certain fields will branch from others based on the conditions you set. Sounds simple, right? In theory, it is. But deciding how to use it and getting it set up properly can get confusing. That’s why I’m here to help.
Read on to learn all you need to know to put Conditional Logic to work for you!
Benefits
The first question you might have is this: Why should I use Conditional Logic? The answer: This feature offers several benefits that can keep people from abandoning your forms and, thus, boost your conversion rates. Here are the top 3 reasons to use Conditional Logic:
- To streamline your online forms – Conditional Logic can make an online form more digestible and less confusing for users by hiding irrelevant fields.
- To keep your forms short – Considering humans have a shorter attention span than goldfish these days, it’s a good idea to make your forms appear as short as possible at the outset (which can be accomplished by hiding fields until they are needed).
- To create a customized form experience – You can use Conditional Logic to display custom messages based on a user’s interaction with your online form, which can make the experience more personal and engaging.
Examples
Now that you know the benefits of Conditional Logic, let’s dive into some example use cases.
1. Survey Commentary
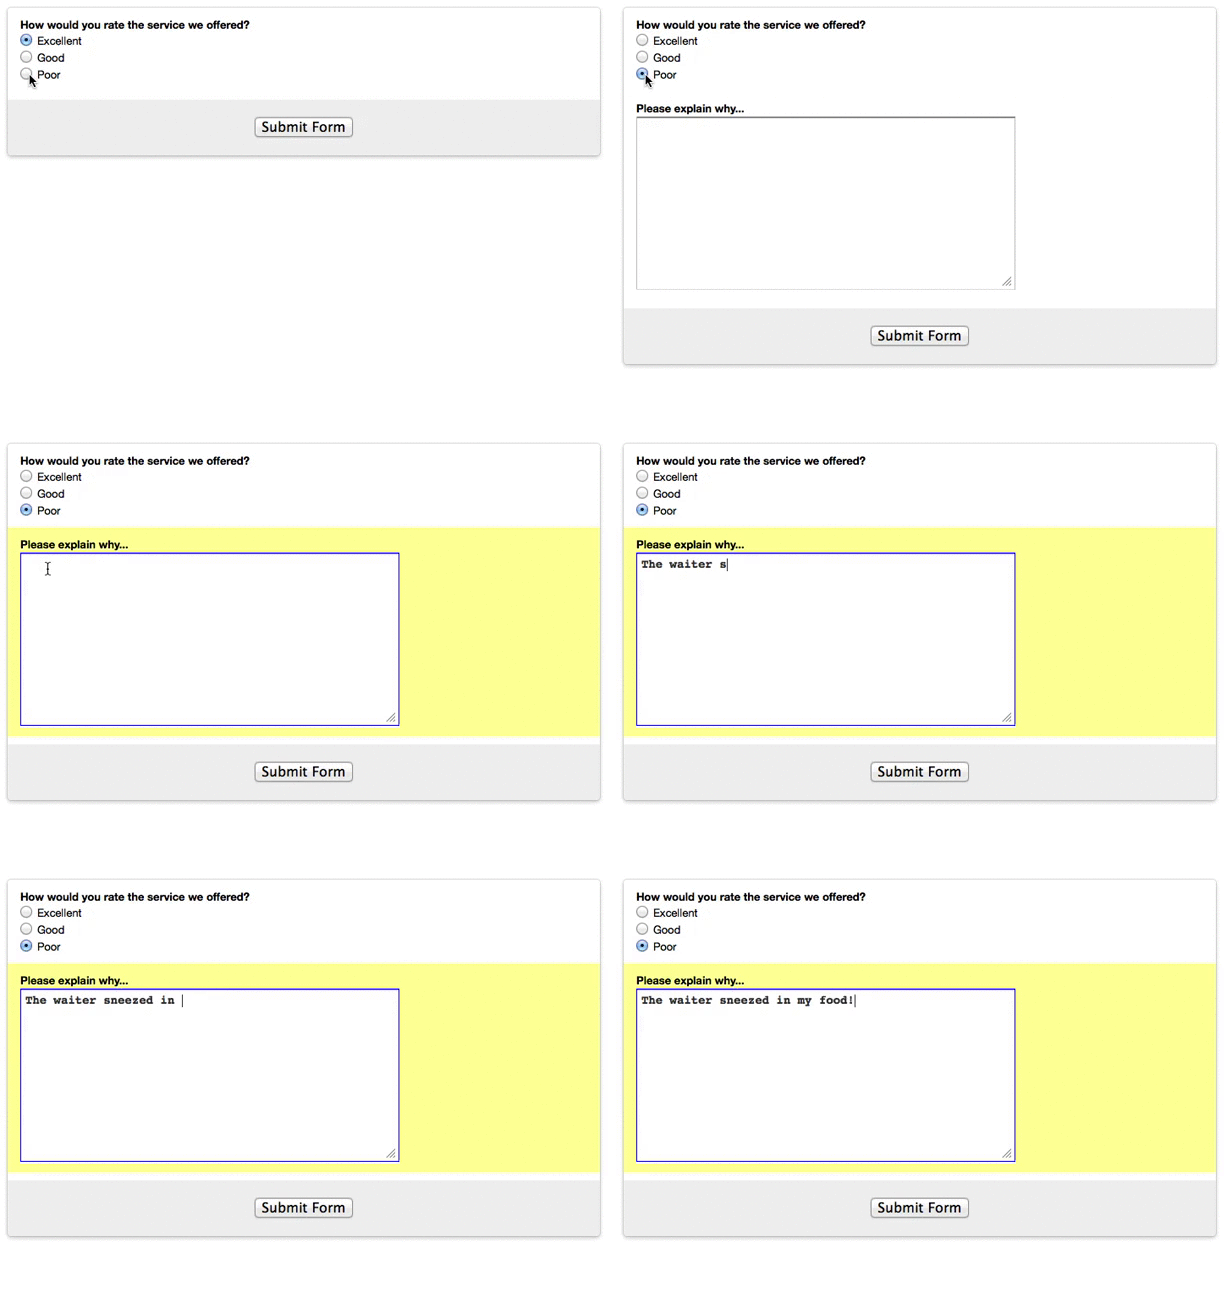
Conditional Logic can help you gather additional information on customers’ negative feedback responses. For instance, if you have a survey question that asks people to rate the customer service at your business, you can create a commentary box that uses logic to pop up (for further explanation) anytime someone gives a poor rating.
2. Multiple Expense Reimbursements, File Uploads, or Product Orders
If you have a form that allows users to request reimbursement for multiple expenses, upload multiple files, or order multiple products, Conditional Logic can help you keep the form organized. For example, with an expense reimbursement form, you can include a Dropdown List field that lets users select how many expenses they need to submit. Then, using Conditional Logic, the correct number of expense fields can populate on the form.

3. Event RSVPs
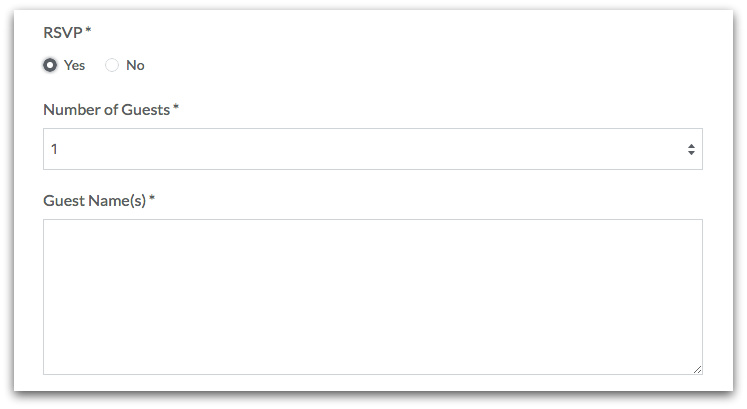
If you have an online event form, you can use Conditional Logic to keep the form simple but still gather necessary information from those who RSVP Yes. For instance, you can include additional fields for Number of Guests and Guest Name(s) and set logic so those fields show up only after guests indicate they plan to attend the event.
4. In-Form Notes
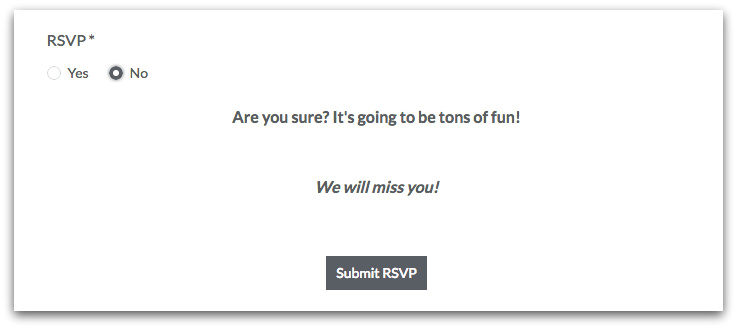
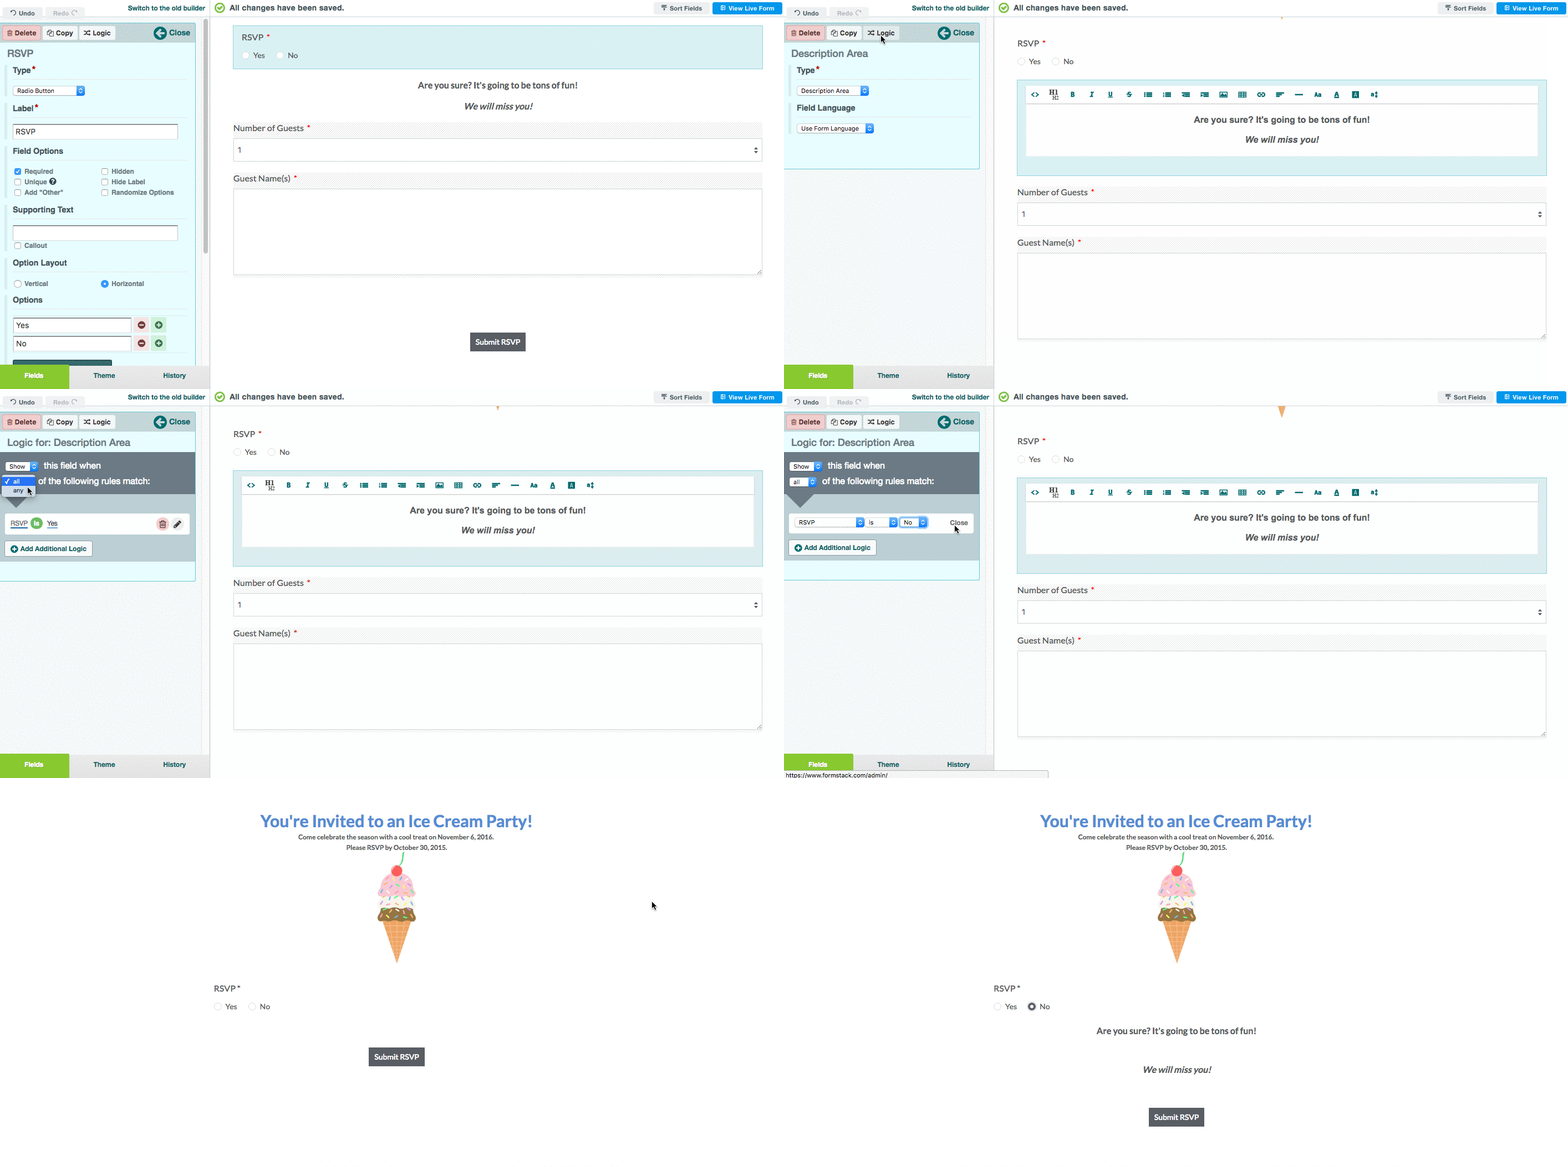
One good way to personalize your forms is to include in-form notes that speak directly to a user based on his or her response on a previous field. For instance, using the RSVP example above, you could add a Description Area field with a small note that pops up anytime someone selects No for the RSVP.
5. Quiz Scores
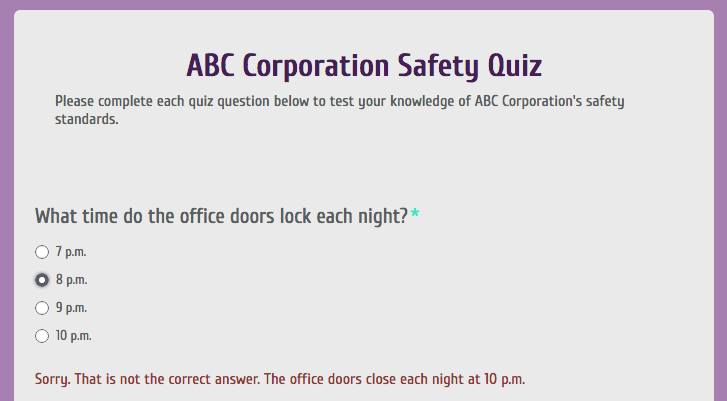
You can use Conditional Logic to give quiz takers immediate feedback on exam questions (i.e., to let them know right away if they have answered a question correctly). For example, you can add a Description Area field to your form with text that indicates a user has selected the wrong answer. Then, you can set logic on that field so that it shows up whenever an incorrect answer choice is selected.
Notes
Before you start implementing Conditional Logic on your form, make sure you understand the following:
- In order to use Conditional Logic, your online form must contain a field with options (i.e, Dropdown List, Checkbox, Radio Button, or Event) or a Number field. This is because you set the logic based on users’ interactions with those field types.
- You can add Conditional Logic to individual fields or to full sections. Any logic you apply to a section will be applied to all fields within that section.
- If you are using a multi-page form, you should not use Conditional Logic on a section that is set to Start New Page. If the conditions are not met for this section to show, the entire page will be hidden, including other sections that would be on the same page. If the top section on a page must be hidden by logic, you can add a blank section above it (with no logic applied to it) that will Start New Page instead.
Setup
Are you ready to put Conditional Logic to work? Great! You can set up a basic field logic rule with just a few quick steps:
- Add the necessary fields to your form (i.e., a field with options, like a Radio Button field, and a field that you want to show or hide based on the choice made on that Radio Button field).
- Select the field you want to show or hide, and click the Logic button in the top left corner of the build screen.
- Click Use conditional logic, and use the dropdown menus in the logic box to set the logic you want (e.g., to indicate you would like to show or hide the field based on a specific response on a previous Radio Button—or other option—field).
That’s it! To see this in action, check out the gif below.
For more information on setting up logic rules on your form, check out our Conditional Logic Support doc.


